
Configure article SEO settings
This guide shows you how to add SEO metadata to your help center articles. You can customize your article's URL, description, and keywords to help search engines find and display your content.
This article covers SEO settings for individual articles. For site-wide SEO settings, see How to customize your help center.
Open an article in your help center editor
In the article editor, look at the top-right corner
Click the sidebar icon next to the Publish button
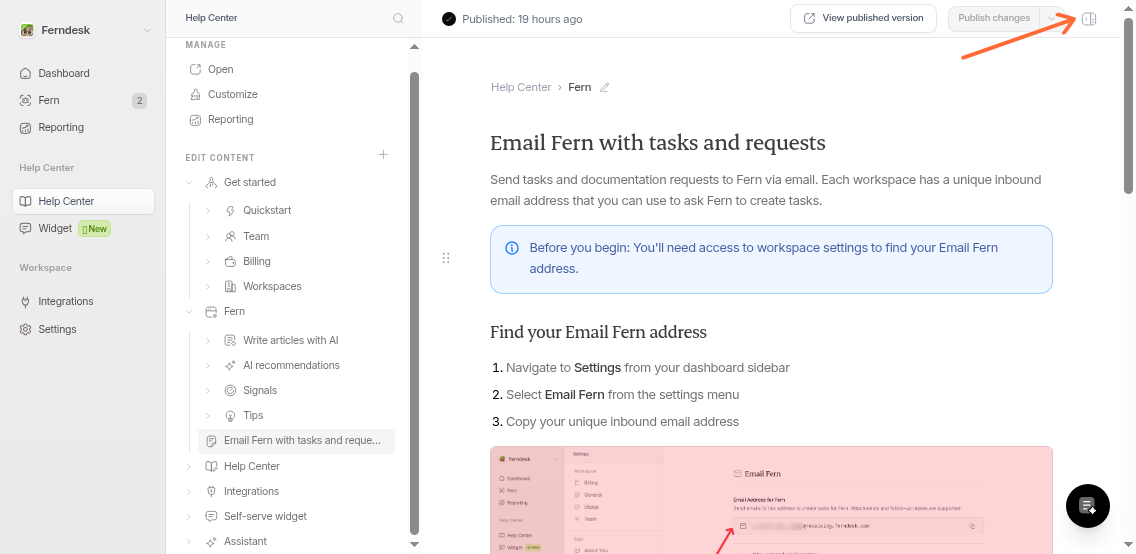
The Settings panel opens on the right side of your screen.
Can't find the icon? It's in the header between "Last saved" and the Publish button. If you don't see it, you might be viewing an external article.
Add your SEO information
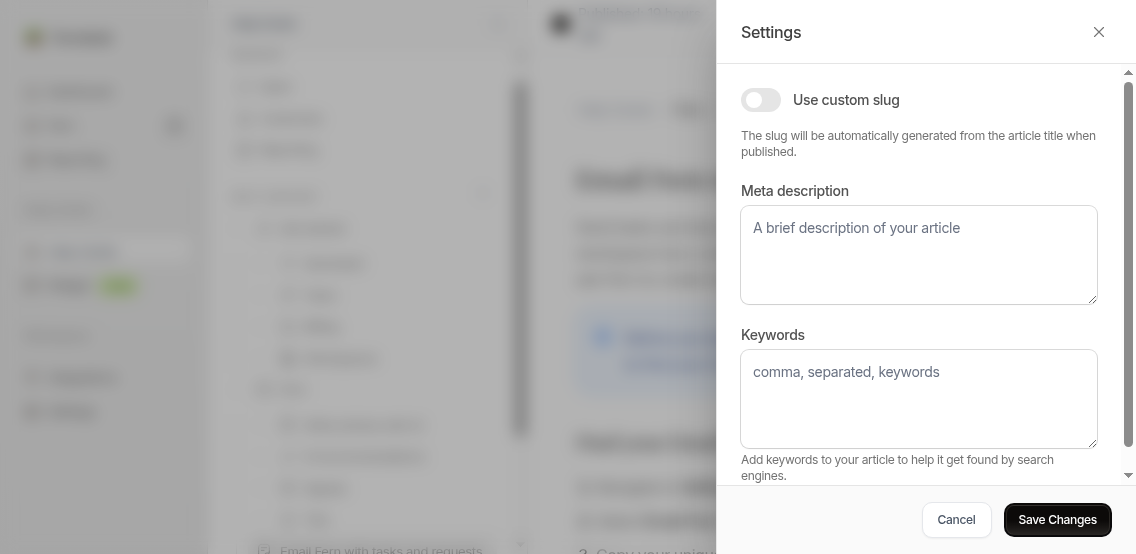
Fill in any or all of these three fields:
Base slug
This creates your article's web address. By default, Ferndesk generates the slug from your title automatically (lowercase, spaces become hyphens).
Example: "How to Reset Your Password" becomes /articles/how-to-reset-your-password-abc123
We append a short string to the end of your base slug.
This short ID at the end ensures URLs stay unique. Old URLs will also automatically redirect if you change the slug.
To customize it, toggle on "Use custom slug" and enter your own. Use lowercase letters, numbers, and hyphens.
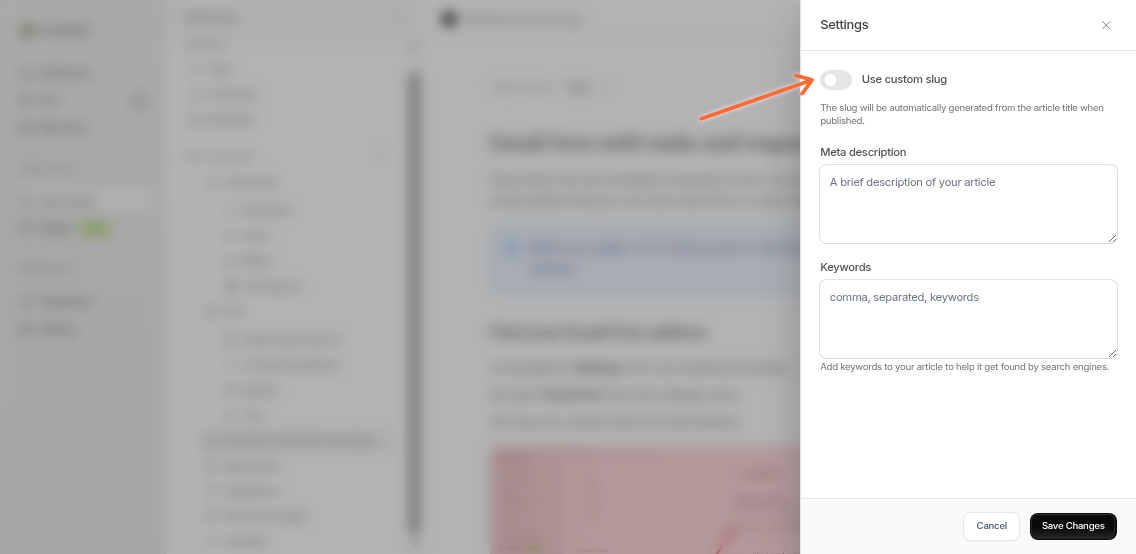
Example: reset-password becomes /articles/reset-password-abc123
Meta description
Write a short summary that appears in search results. Tell readers what they'll learn.
Keep it under 155 characters so it displays fully in search results.
Good example: "Learn how to reset your password in under 2 minutes using email verification or security questions."
Keywords
Add keywords separated by commas that match your article topic. These improve search performance.

Example: password reset, login help, account recovery
Save your work
Click Save Changes at the bottom of the Settings panel
Wait for the "Saved successfully" message
The panel closes automatically

To cancel, click Cancel or the close icon.
Remember to publish your article for the SEO changes to go live. Click Publish changes in the editor header.
Tips for better SEO
Make slugs descriptive: Use words people actually search for
Keep descriptions short: Aim for 120-155 characters
Write unique descriptions: Each article needs its own
Use natural keywords: Pick words that match your content
Update regularly: Refresh your SEO as your content changes
For more SEO tips, see SEO & GEO optimization for your help center.
Common issues
I don't see the Settings icon
Check these:
Article type: External articles show "Edit in [platform]" instead. Configure SEO in that platform.
View mode: Make sure you're editing, not viewing the published article.
My changes didn't save
Try these steps:
Check your internet connection and save again
Refresh the editor and re-enter your changes (don't worry, drafts are saved automatically)
Make sure you clicked Save Changes in the Settings panel, not just Publish changes
Related articles
How to customize your help center - Site-wide SEO settings
SEO & GEO optimization for your help center - Complete SEO guide
Using Help Center Analytics to Improve Your Content - Track and improve performance